Classes and Teaching
Classes have a 10 week winter term usually starting in September until Christmas.
Then a Spring term of 10 weeks until Easter and a summer term that varies.
Run by my ex-students.
Ashtorre Centre. Wed.1.30 - 3.30
St Budeaux Library. Wed.10am -12.00
Yes, after all my working life as a teacher I have decided to retire!
I am very pleased that the groups are carrying on, self contained
and well organised with good leadership from within the group.
If you are interested in joining, then by all means email me so
that I can pass on your request.
.............................................................................
Online Teaching Download below
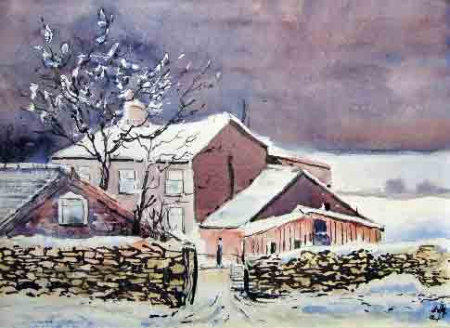
Free Watercolour Lesson : Snow
Welcome to the free watercolour project. Christmas Card
Snow
LINE & WASH
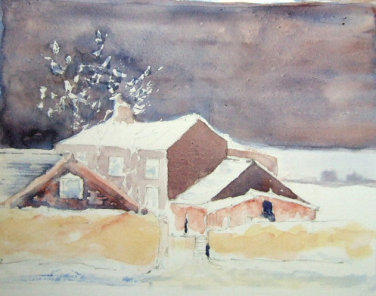
I based this on a painting I did of a farm some time ago. It is the white paper that makes it all
work. Please feel free to use this for a Christmas card if you would like to.
Colours: You will need a few watercolour paints. For this painting I used: Ultramarine
Blue, Raw Sienna (or use Yellow Ochre) and Light Red (this is a brownish paint, if you
don’t have this, then use Burnt Sienna with a little Crimson)
I also used: Masking fluid, a fine brush or pen for detail, something to scratch with! I
always recommend using proper watercolour paper.
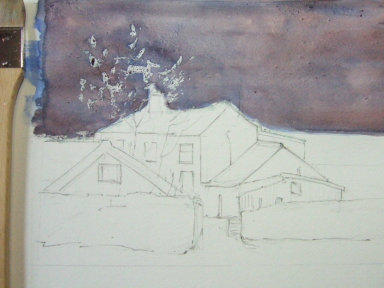
Painting preparations
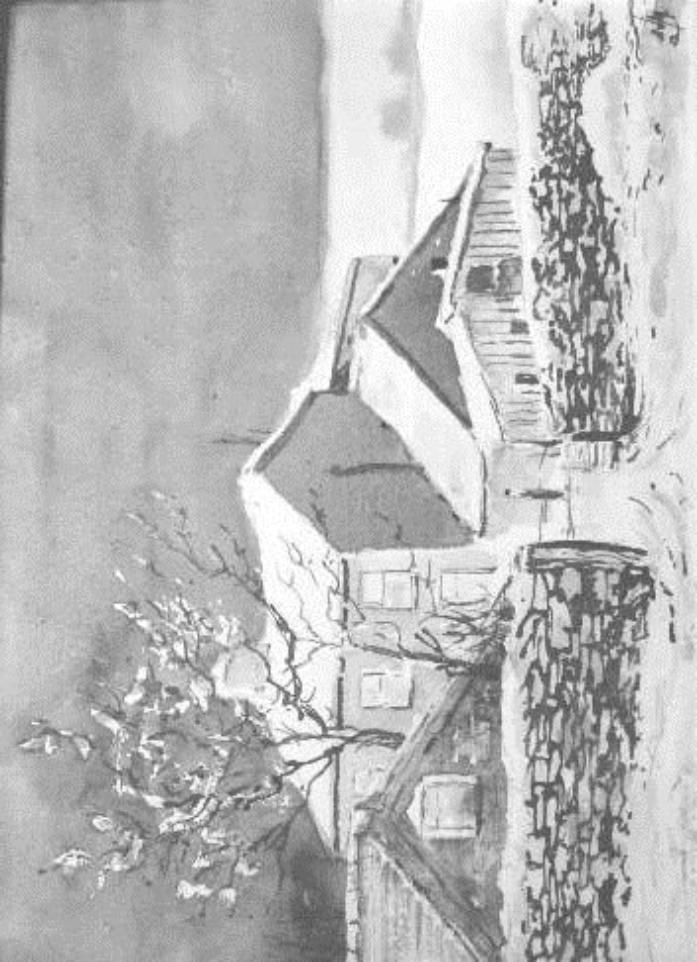
1. Draw out, you can use the template image, on the last section of this project to help.
Before I start painting, I always recommend taping down the edges of the paper.
I suggest you mask out the skyline edge. (To prevent the sky colour from running into the
white roof and chimney top.) Also a little masking fluid for the tree frost and snow, if you
like. Let this dry
I would not try and mask snowflakes, unless you can apply it in tiny specks. This can
sometimes be achieved with a toothbrush, but it is hit and miss.
If you don’t want to use masking fluid then there is the alternative of scratching back later
to the white paper ( see below) or using a little white acrylic paint.
Painting
2. Mix up a dark sky from Ultramarine and Light Red.
Or Ultramarine and Burnt Sienna plus a little Crimson.
Paint in the sky. Take care with snow edges and the chimney behind the tree
Notice the light side and shadow side of the buildings
.
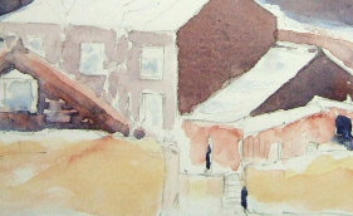
3. Using the sky colour you have already mixed up, thin and vary the shades on the
buildings. (Try to add interest by creating a variety of shades)
Use a light wash of Raw Sienna on the near dry stone walls.
You could add a few other light shades of blues, pink/purples here, but thinly.
4.Pale blue on the foreground snow.
Do this by painting the area with water first and then feeding in a little blue paint while
wet to create soft edges of blue.
5.Take off your masking fluid when the paper is dry underneath.
6.Choices for the dark lines. Either use a pen with ink, or use a fine brush and a mixed
dark paint. You can get a good dark from mixing your sky colours even darker or use
black paint. I used a pen and ink. Do a little of the wall at a time and rest. Try to vary the
stones shape and size I say this because it is so easy to do the stones in the wall the same
shape after a while. For the tree be bold with your penstrokes, but don’t overdo it!
Tip: Don’t fall into the trap of making your lines all straight and the same thickness. The
painting will be more interesting if you vary your marks. Also think SNOW, SNOW, SNOW IS
WHITE. Don’t cover it up!
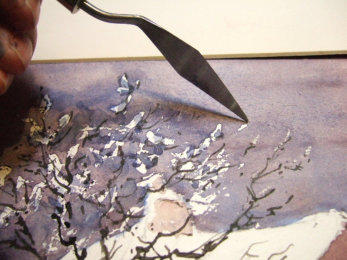
7.Snow in the sky
Are you a scratcher, not everybody is!
Have you anything to scratch with? I used a palette knife, or a small craft knife. You can
now scratch out tiny white marks in the sky to represent snow. It is a bit tedious. It
depends on how much it is snowing. It might just have stopped!
That’s it. Date it, sign it and sell it, and/or use it for Christmas cards! More on my Etsy site